Hey there, if you’re someone who’s ever dug into a 4WD or truck repair, you know the transfer case chain is the unsung hero of your drivetrain. It’s what shifts you from 2WD to 4WD without making you stuck at the gas station, so messing up its replacement? That’s a one-way ticket to a tow truck bill (and a whole lot of headache). I’ve been selling transfer case chains for over a decade now, and let me tell you—every week, I hear stories from techs and DIYers who cut corners on this job, and it always ends the same way: they’re back three months later begging for a replacement chain (and a lifetime pass to stop rushing). Today, I’m spilling the beans on the most common mistakes I see, straight from the trenches of being a transfer case chain supplier—no fancy jargon, just real talk from someone who’s seen the good, bad, and ugly of this part. Transfer Case Chain
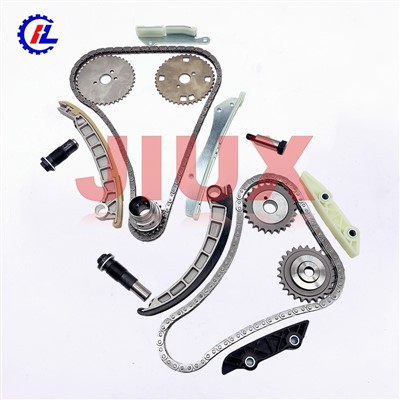
First off, let’s get one thing straight: a transfer case chain isn’t like a bicycle chain. It doesn’t just slip on and tighten like a pair of jeans. Most people skip the step of matching the chain’s pitch and width to the transfer case’s OEM specs, and that’s mistake number one. I once had a DIYer bring me a beat-up chain he’d bought from a random auto parts store, bragging how it was “just the same size.” Turns out, the pitch (the distance between each roller) was off by a hair—barely noticeable at first, but enough to cause grinding every time he shifted into 4WD. He’d skipped pulling the old chain’s pitch measurement, or even checking his transfer case’s service manual to confirm the exact part number. Rookie move. When you’re replacing this chain, don’t guess. Pull the old chain (even if it’s worn) and measure both the inner width of the side plates and the roller pitch. If you’re not sure how, hit me up—I’ll walk you through it. Guesswork here doesn’t save time; it makes you re-do the job twice.
Next up: ignoring the sprockets. Oh, this is my personal pet peeve. I can’t tell you how many techs will swap out a worn chain but leave the sprockets looking like they’ve been through a mud pit. “The chain’s bad, not the sprockets,” I hear them say. Newsflash: a chain’s wear is directly tied to how the sprockets look. If your sprockets have pitting, gouges, or are stretched beyond their spec, a new chain will only last half as long as it should (if that). I had a customer last year who installed a brand-new chain from my warehouse, then was back in 6 weeks because it snapped. When I asked what he did to the sprockets, he admitted he “didn’t think they mattered.” Turns out, the sprocket teeth were worn down to nubs, so the new chain was skipping and pulling too hard until it broke. Always inspect the sprockets at the same time you replace the chain. If they’re damaged, swap them too. It’s an extra $80 or so, but it saves you from a $1,500 tow and repair bill down the line.
Then there’s the mistake of not pre-stretching the new chain. Wait, you didn’t know chains stretch before installation? Yeah, I didn’t either until a few years ago, when a master tech at a local shop set me straight. Most new transfer case chains come from the manufacturer with a tiny amount of “manufacturer stretch” — not the wear stretch that happens on the road, but just enough that if you install it straight from the box, it’s going to loosen up in the first 100 miles. I see this all the time with DIYers who skip pre-stretching, and end up re-tightening the chain three times in a month. How do you do it? It’s easy: pull the chain taut between two jack stands or heavy objects, then apply a firm, steady pull for 30 seconds to a minute. That removes that extra initial slack so your installation is tight from day one. Don’t skip this step—it’s 2 minutes of work that prevents a whole lot of frustration.
Another big one: not properly lubricating the chain during installation. I know, I know—you’re crammed under a truck in a garage that’s 90 degrees, and lubricating the chain feels like a waste of time. But transfer case chains run in a sealed housing that’s supposed to have gear oil, and if you don’t lube the new chain when you put it in, it’s going to wear out way faster. I once sold a bulk order of chains to a shop that forgot to tell their techs to lube, and 5 of those chains failed within 2 months. Turned out, the dry chain was grinding on the sprockets without any oil cushion. The fix? Before you thread the chain onto the sprockets, dip it in transfer case fluid (not regular motor oil—transfer case fluid is thicker and made for this kind of load). Make sure every roller and pin is coated. It takes 5 minutes, and it’ll double the lifespan of your new chain. Trust me on this.
Wait, let’s talk about the “quick disconnect” shortcut. A lot of people try to use a master link to connect the new chain, but not all master links are created equal. Most DIYers grab a generic master link from their parts bin, but transfer case chains have specific master links that are designed to handle the heavy torque of 4WD and off-roading. I’ve seen generic master links snap while someone’s driving on the highway—terrifying, I’ll tell you that. Here’s the rule: only use the master link that comes with your transfer case chain, or get one made specifically for the chain you’re installing. If you have to use a riveted chain (some heavy-duty ones don’t use master links), make sure you use a chain press to rivet it properly. Don’t hammer it on with a wrench—that’ll misshape the pins and cause breakage. I always tell customers: if you’re using a master link, don’t cheap out on it. It’s the only part holding the entire chain together.
Oh, and don’t forget the old gasket. When you’re pulling the transfer case apart to swap the chain, you have to separate the housing halves, right? A lot of people just scrape the old gasket off with a flathead and call it good. Big mistake. Residue left on the housing can cause leaks, which means you’ll lose fluid, which means the chain will overheat and wear out. I had a guy last month who did this, and a week later he was calling me panicking because his transfer case was pouring fluid onto the road. He had to pull the whole thing apart again, re-seal it, and buy a new chain (again). Take the extra 15 minutes to clean both housing halves with a scraper and some brake cleaner, then apply a new gasket—even if it’s just a paper gasket from the auto store. It’s way better than fixing a leak later.
One more common mistake: not testing the shift after installation. I can’t tell you how many people bolt the transfer case back together, drive it around the block, and call it a day. But you need to test every gear setting—2WD, 4WD High, 4WD Low, maybe even neutral if your transfer case has that—before you close everything up. I had a customer who forgot to test 4WD Low, and when he tried to use it on a snowy day, the chain was misaligned and it wouldn’t engage. He had to take the whole transfer case apart again because he’d already bolted everything back with the skid plate on. Save yourself the hassle: after you install the chain, hook up the shift motor, turn the key on, and cycle through all the settings in the garage. If it grinds or doesn’t engage, you can fix it right there instead of having to lift the truck again later.

Look, I get it—replacing a transfer case chain is a messy, time-consuming job. You’re under a truck, covered in grease, and all you want to do is get back on the road. But cutting corners on any of these steps is like buying cheap tires for your 4WD—it might work for a little while, but eventually, it’ll leave you stuck. As someone who’s supplied transfer case chains for years, I’ve seen firsthand what happens when people skip these basics. The good news? None of these mistakes are hard to avoid—they just take a little extra attention to detail. If you’re not sure about any step, just reach out to me. I don’t do fancy sales pitches— I help techs and DIYers get the right parts and do the job right the first time. Whether you need a specific chain, sprockets, or just someone to walk you through the installation, I’m here to help. Don’t waste time, money, and stress on a botched replacement—get it done right, and you’ll be 4WD ready for whatever comes next.
Timing Guide Rail References:
- Automotive Transmission & Drivetrain Association. (2022). Transfer Case Maintenance Best Practices. Retrieved from industry technical manuals for light and heavy-duty vehicles
- SAE International. (2021). Guidelines for Drivetrain Component Installation and Inspection. Report No. SAE J2237
- Transfer Case Manufacturers Association. (2020. Common Installation Errors and Longevity Factors for Transfer Case Chains. Industry White Paper.
Huzhou Hongli Auto Parts Co., Ltd.
With abundant experience, we are one of the most professional transfer case chain manufacturers in China. Please rest assured to buy customized transfer case chain at competitive price from our factory. If you have any enquiry about cooperation, please feel free to email us.
Address: Building 16, No.50 / Building 18, No.58, Dadongwu, Lianshi Town, Nanxun District, Huzhou, Zhejiang, China
E-mail: jiux@timingkit.cn
WebSite: https://www.jiuxkit.com/
